|
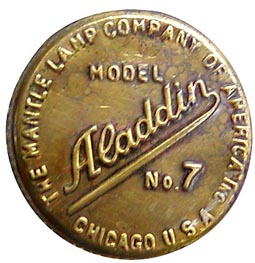
Aladdin Model 7 lamp Sold
from 7 August 1917 through July 1919
(Not sold into Canada. The model 6 continued to
be offered to the Canadian market)
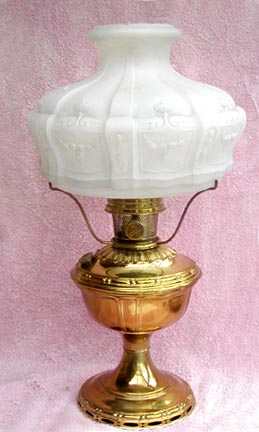
401 shade |
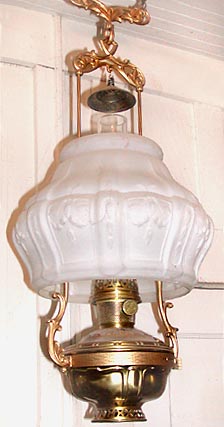
416 shade |
|
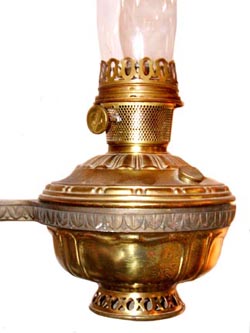
The Aladdin model 7 lamp was a completely new and revolutionary
lamp in every sense of the word.
The model 6, propelled to fame by winning a gold medal at
the 1915 World's Fair in San Francisco, was extremely successful
for The Mantle Lamp Company. Popularity and sales were at
an all time high and The Mantle Lamp Company decided it was
time to design their own lamp from the ground up.
If you look back through Aladdin's previous lamp offerings
you can see that the Aladdin model 7 was the very first lamp
that was truly an all Aladdin lamp.
The models 1 and 2 were made almost completely from existing
Plume & Atwood lamp bowl tooling. Model 3 saw Aladdin's
first real engineering improvements. But they basically added
an improved wick adjusting mechanism, new gallery, mantle
and generator to an existing mix of Plume & Atwood tooling.
The models 4, 5 and 6 were basically marketing upgrades
with very minor actual improvements over the model 3. The
most noticeable change was the model 4 generator which is
a generic P&A style. The generic P&A style was more
robust and worked better with the Kone-Kap gallery.
There was some sort of licensing or ownership arrangement
between The Mantle Lamp Company and Plume & Atwood that
allowed P&A to use much of the Aladdin tooling to manufacture
lamps for other companies as well as Aladdin.
As an example the Solar lamp was in marketing competition
with the Mantle Lamp Company selling what is basically an
Aladdin model 1 quart and a half table font crowned by a Solar
labeled Aladdin model 6 burner. Because of this licensing
or lack of tooling ownership, Aladdin was basically in competition
with it's own lamps.
The model 7 tooling put an end to all that and for the first
time a uniquely Aladdin lamp was offered
.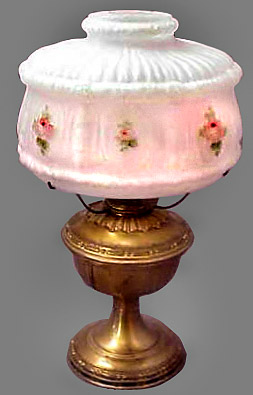
400 shade |
|
Variations:
Table - Finish: clear
lacquer over satin finish brass
Font - (Wall mount & hanging,) - Finish: clear
lacquer over satin finish brass
Transition (very early lamps) - None I have identified
Accessories:
Bug screen: Early style bug screen
wick cleaner: 3 prong style, Aladdin name is underlined writing
Shade ring: An entirely new under burner shade ring. Satin
brass finish with arms spaced for 8-3/4" dia glass shade
Shades: table - 401, very rare 400 rose shade, hanging -
416
Chimney: Heelless globe type (rounded bulge near
base), crest logo
|
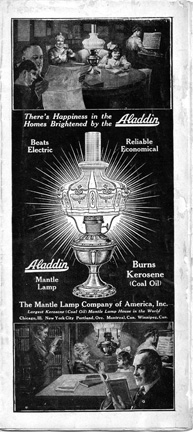
Click to see catalogue pages (15 pages + cover)
Undated but likely to be 1918 because first model 7 wall bracket had already been replaced by later cast open hoop model 7 & 8 wall bracket.
|
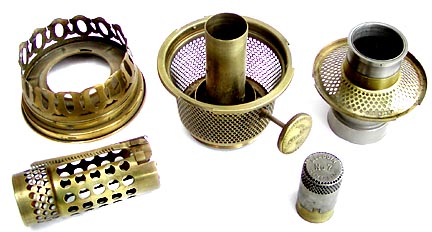
The Aladdin model 7 burner, like the rest of the lamp is completely
new in every sense of the word. If you look at each new feature
on the burner you can see how it was added to address what was likely
a common customer complaint. Not only was the model 7 going to be
different that the other P&A manufactured mantel lamps but is
was going to be very noticeably better. With the model 7, the Aladdin
sales force was going to have a real answer to the other company's
sales force when they said "It is exactly like an Aladdin,
only cheaper"
Inner wick tube
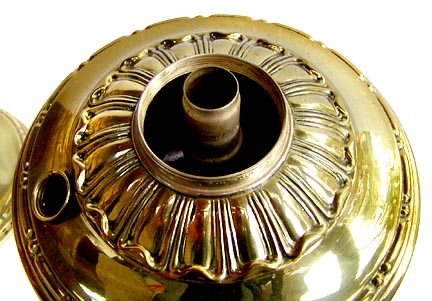
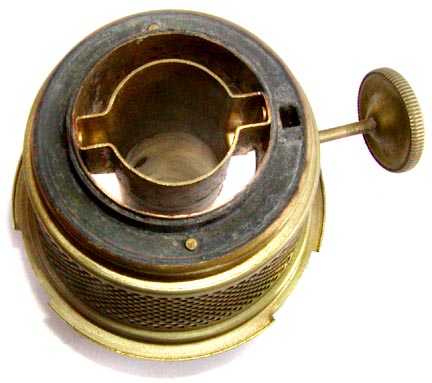
One very noticeable item that visibly separates the model 1 through
model 6 lamp bowls from the model 7 and later Aladdin centre draft bowls is
the inner wick tube. On earlier models the tube went from the bottom
of the lamp bowl to the top of the burner. This soft brass tube
stuck out above the top of the bowl a couple inches where it was
very susceptible to damage. The inner wick tube has to remain centered
in the burner and have no dents or creases in order for the lamp
to work correctly. Damage the tube when replacing a stuck generator,
or by accidentally dropping the lamp with the burner off and the
lamp will never burn right again unless you are skilled in brass
work. The Aladdin model 7 introduced a split inner wick tube with the top part attached inside the burner with 2 arms. This assured that the inner wick tube would be concentric with the outer wick tube and that the wick would be able to move more freely without the wick tubes pinching it on one side.
The new lower inner wick tube tapers to a smaller diameter at the
top and the new upper inner wick tube is firmly secured at its base.
This means the bowl's inner wick tube can get bent or otherwise
damaged and easily be made to fit to the burner. The side to side
gap between the between the two tubes lets air into the bowl to
equalize air pressure as the kerosene is drawn up into the wick.
Past solutions were vented filler caps or holes drilled into the
side of the inner wick tube.
Having a short top inner wick tube firmly affixed to the base of
the burner virtually assured that the inner and outer wick tubes
would remain concentric and allow easy wick movement. And if an
accident happened to the inner wick tube top edge, you replace the
burner and not the entire lamp.
This one change required several other changes to the burner. Suddenly
there were these two arms blocking the space between the inner and
outer wick tubes. Model 6 and earlier wicks were mounted from the
underside of the burner. The top inner tube support arms required
that the model 7 wick be mounted from the top.
 |
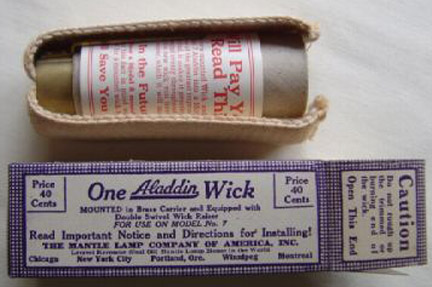
The unreinforced wicks used at the time did not lend themselves
to customer mounting. The length of the wick above the the
holder is important to proper wick adjustment and the unreinforced
wick is quite fragile. Aladdin burner design requires the
wick gear to be inserted from below.
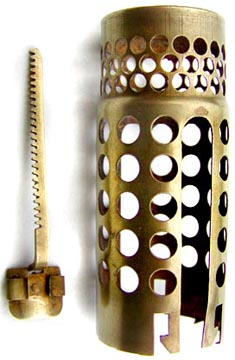
Aladdin's first attempt to solve this new dilemma was the
model 7 two piece wick carrier. You detach the gear from the
carrier then slide the mounted wick down from the top. Next
you fit the carrier gear to the burner gears, run it up to
the bottom of the carrier and lock it into place. There is
a gear lock on both sides of the wick carrier so you can never
insert the wick backwards.
You could consider the removable gear as Aladdin's first
wick holder that attaches to the wick carrier as does the
model 8 and early 9 holders did.
|
To insert the wick from the top you need a removable outer wick
tube.
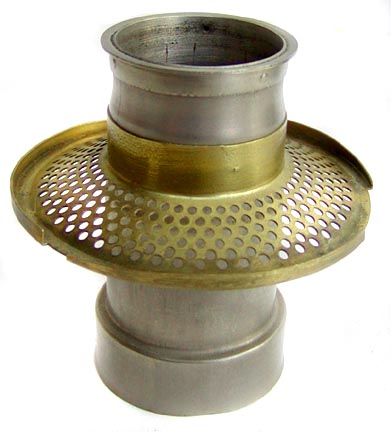
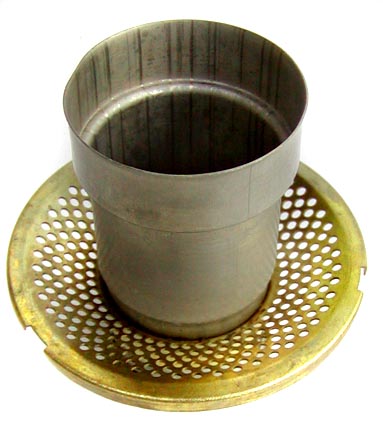
Aladdin made the outer wick tube two piece with a removable top
section and permanently mounted the air distributor to the removable
outer wick tube. This provided physical space to get the bottom
wick ends through the base and to hold onto the wick carrier while
inserting the wick over the inner wick tube. It also allowed access
to the outside of the upper inner wick tube to keep it clean of
carbon deposits that can inhibit smooth wick movement. There is
a very short section of outer wick tube built into the burner base
that the bottom of the removable tube slides over.
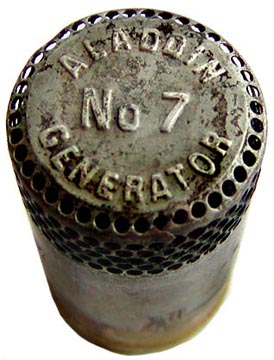 |
The new burner with removable wick tubes required a longer
generator. Aladdin still needed to produce model 6 generators
for the model 4 through 6 replacement parts market. So rather
than spending money for a second set of generator tooling
they added a brass skirt to the bottom of the generator created
by the existent tooling. The lettering on top of the generator
is formed by relatively inexpensive dies inserted into the
tooling.
It is quite conceivable that the same basic tooling was used
to form Aladdin and competitor's generators from model 4 through
11 with just lettering die changes. |
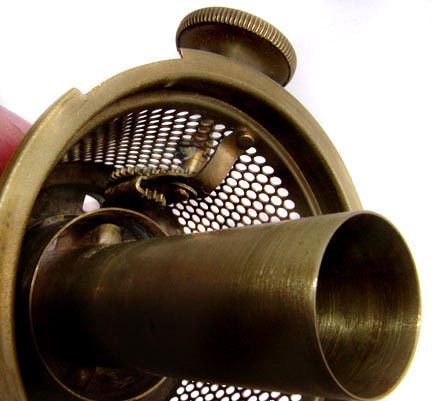 |
Another customer issue the Mantle Lamp Company addressed
in the design of the model 7 burner is the wick adjuster gearing.
The model 3 gearing, used through model 6, was a single gear
at the end of the adjuster shaft. Fine adjustment of the wick
needed to achieve the most possible light without sooting
was difficult. Also, if the wick or wick tubes were dirty,
turning the adjuster knob could be difficult.
The redesigned model 7 burner introduced gear reduction,
making fine adjustment easier and with less effort.
Of course all these additions took up space and the new burner
base had to be made with a larger diameter. Which, coincidentally
meant that if one wanted to take advantage of these new features
one had to purchase a new lamp and not just a burner. Also,
that Aladdin burners could not fit competitor's lamps. |
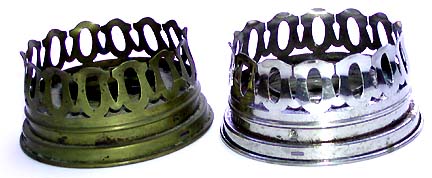
Model 7-8 gallery left & 9-11 gallery right |
The top of the new burner is
slightly larger in diameter than the previous burners and the
burner to gallery interlock is slightly larger and more robust.
This required a new gallery. Aladdin Galleries are two piece
with a single stamped bottom and tubular chimney attachment
section. The finger attachment ring is a friction fit over the
upper sides of the gallery base and is held into place by 3
evenly spaced dimples. Though the gallery base of model 3 through
6 galleries look the same as the base part of the model 7 through
11 galleries the dimensions of the newer gallery are slightly
larger. Generally by 0.1 inches or less in each dimension. |
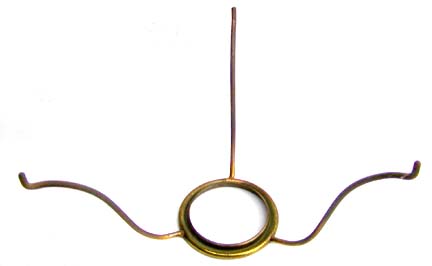 |
The model 7 lamps got 3 entirely new glass shades and an entirely
new shade holder tripod. All tripods previously sold for Aladdin
table lamps had been mounted on the gallery. Lighting the lamp
required removing the shade then removing the gallery to put
a match to the wick. A shade attached to the base of the lamp
does not need to be removed in order to light the lamp.
Note the inner lip inside the ring. Under burner shade holders on pre-model 12 lamps have a vertical lip/ Under burner shade holders on models 12 and newer lamps have a horizontal inner lip. This is because of differences in the lamp base construction at the threads. The shade holders are not interchangeable. |
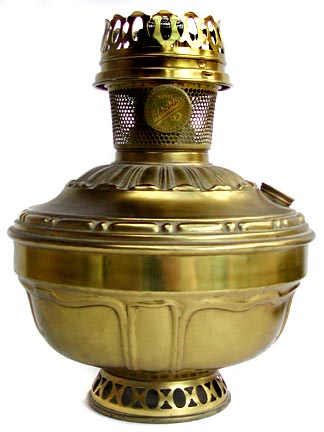 |
During the late nineteen tens, more Americans were living
in better homes with more and nicer furnishings. People were
getting rid of Victorian style furnishings and replacing it
with newer styles. Lots of Americans returned from the war
with tastes influenced by French designs and Nouveau styles
were big in America.
Aladdin jumped into the new furnishing styles market with
both feet when they designed the entirely new upscale and
fashionable model 7 product line. Aladdin paid for completely
new tooling for two new lamp bowls a new wall hanger and a
new lamp hanger. Tooling for the model 7 lamps could well
have been the single largest expenditure The Mantle Lamp Company
had made to date.
Both the hanging and table lamps have a 1-1/2 quart capacity. |
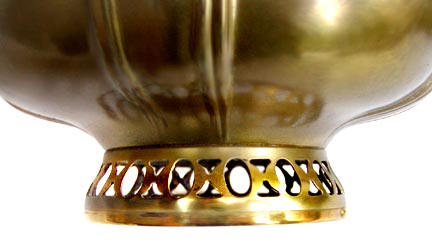 |
A new bottom skirt was made for this lamp. |
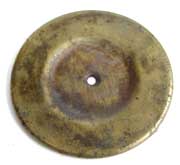 |
The bottom drip plate is in the same style as the one used
in the late model 6 font lamp except larger in diameter. |
 |
An entirely new oil fill cap was produced for the lamp. |
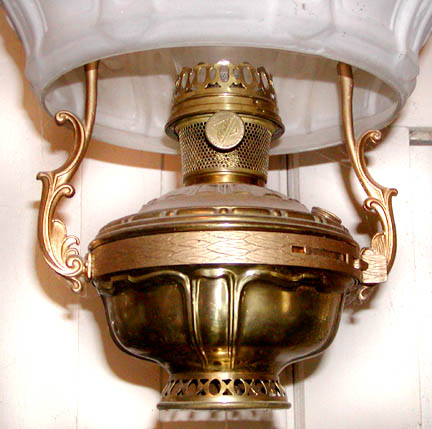
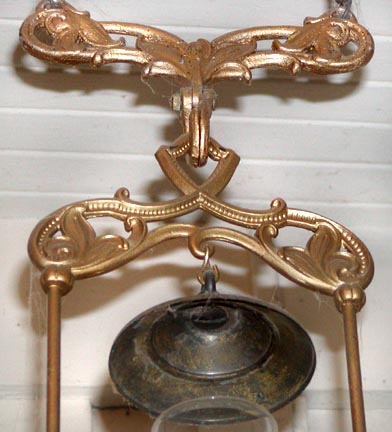
The font hanger carried on the new style creating an integrated
up scale Nouveau look. The pull down extension for this lamp was
modified to go with the hanger. Two new wall holders were produced
for the new larger diameter font lamp.
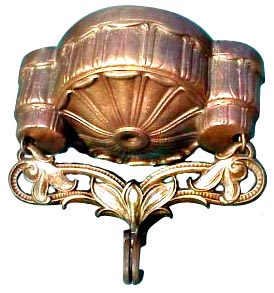

The bolt used with the Model 7 ceiling extension.
|
The Aladdin model 7 got a whole new ceiling mount and extension. The body was brass plated cast iron. Nickel plated versions were available for the earlier lamps and the model 6 concurrently being sold in Canada. |
The model 7 and 8 font lamps were only available with the glass shade included. The Model 7 font lamp wall mounting bracket was originally a model 6 wall mount with the ring expanded to a 7 inch diameter. The steel 7 inch diameter ring held on to the arm with 2 rivets. The steel rim was stamped with the same pattern as the mounting ring on the hanging lamps. After release Aladdin quickly found out that the weight of the larger lamp full of kerosene plus the weight of the shade was too much for the wall bracket. The steel rim tended to bend down from the weight and people handling the lamp. So early on during model 7 production Aladdin introduced a cast bracket that was a lot stronger than the original. The cast wall mount is a lot more common than the early ring style wall bracket.
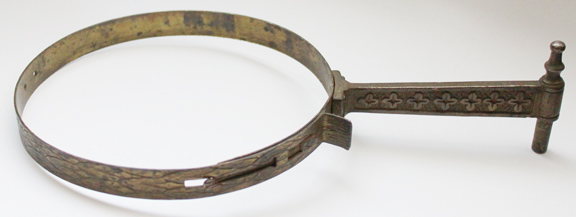
Early model 7 wall bracket. Note pattern on side of ring matches pattern on hanging lamp holder.
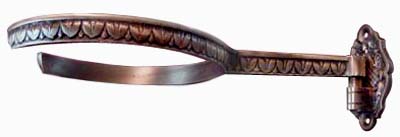
Late model 7 and model 8 wall mount bracket made of brass plated cast iron.
Finish
There seems to be a common belief that the Aladdin
model 7 and 8 lamps used a special finish that was different from
other Aladdin lamps and very fragile. I've heard it from most collectors
and dealers I have talked to since I first started collecting Aladdin
lamps. Of all the brass finish Aladdin lamps, people seem
willing to pay a higher premium for an original factory finish
on a 7 or 8 than for other early Aladdin brass lamps. I'm
told that this is because the finish is special. It
is time to bust this myth. The finish is just plain clear
lacquer applied over satin finish brass. Plume & Atwood has
been applying clear lacquer to brass finished lamps before Aladdin
was founded and continued to do so. To the best of my research
all Aladdin brass finish lamps ever made were finished with a clear lacquer
paint from model 1 up through model 23A. The finish on the
model 7 and 8 is no different from that of a model 5 or 6. The
only difference is that collectors are more careful with the finish
on model 7 & 8 than the other models.
In the Aladdin sales lists the finish is listed as
satin brass, same as the models 5 & 6 before them. Below
is a picture from a model 8 owners manual. I
typed the text below since readability isn't the best.
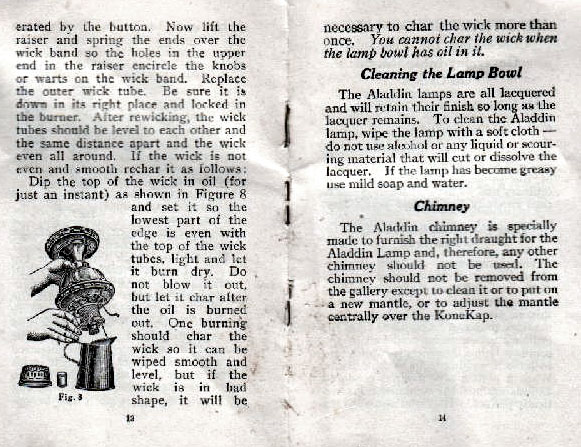
From the manual page above:
" Cleaning the lamp bowl
The Aladdin lamps are all lacquered
and will retain their finish so long as the lacquer remains. To clean the Aladdin
lamp use a soft cloth - do not use any alcohol or any lacquered
or scouring material that will cut or dissolve the lacquer. If
the lamp becomes greasy use mild soap and water."
These are the same instructions you will find in
the model 6, 5 and I presume earlier lamp manuals. There
is nothing special about the finish on the model 7 & 8 lamps. The
only thing special is the care taken by collectors and dealers
to preserve it. The
old formula lacquers had a golden tone to it which deepens with
age. The
lacquers used on Aladdin lamps for the last half century are
clear with not colour tone to it.
Parts support and interchangeability:
Mantles: Production of Aladdin KoneKap mantles ceased in 2007. In 2012 Aladdin introduced an adapter that fits onto a model 3 through 11 gallery that allows the use of a Lox-On mantle with the earlier lamps.
Wick/Carrier: Models 8, 9, 10 and 11 wicks can be used if you use the correct carrier for that wick. Model 11 wicks were discontinued in 1955.
Gallery: The model 8, 9, 10 and 11 galleries can be used.
Generator: Model 8, 9, 10, and 11 flame spreaders can be used. The model 11 flame spreader was discontinued in 1955.
Burner: Model 8, 9, 10, 11 and 12 burners can also be used with this lamp
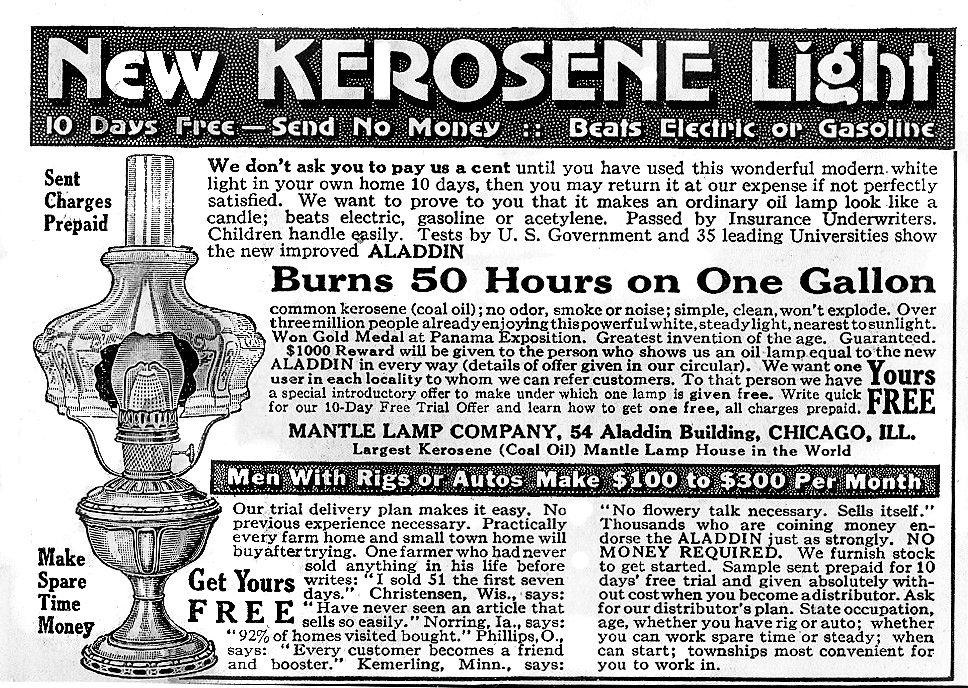
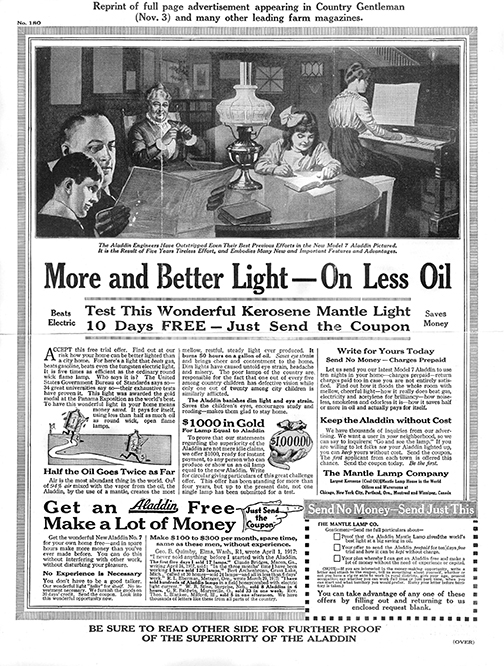
Click to see a high resolution pdf file of this Aladdin model 7 ad
|
![]()
![]() Contents > Aladdin model 7 lamp
Contents > Aladdin model 7 lamp


